Acorn Squash with Cranberry and Apples

I love the mix of apples & cranberries.  The pair just seem to go together so well.  A Thanksgiving recipe that includes them together is always the first thing I seem to try.  This recipe was shared with me a few years back on Thanksgiving — after I had eaten as much as possible ;)

The original recipe called for soaking the cranberries in ‘grape juice’, but that just seemed so odd to me.  I then experimented with cranberry juice and orange juice.  Both work really well.   See below for some variations.

Acorn Squash with Cranberry and Apples

2 acorn squash
6 tablespoons butter, melted, divided
1/4 cup dried cranberries
1/4 cup cranberry juice (or orange juice)
3 medium apples
1/4 cup brown sugar
1 tablespoon lemon juice
1 teaspoon cinnamon

Acorn Squash

Prep the squash by cutting it in half, and cleaning out the seeds & strings.  Brush the top

with melted butter. On a baking sheet, place the squash face down, and pour 1/2 cup water onto the baking sheet – it should be just enough to cover the bottom.  Bake for about 30 minutes at 350F.

Meanwhile, soak the cranberries in the cranberry juice (or orange juice).  Peel, and chop the apples until they are about 1/2 inch or so.  Melt the remaining butter (about 4 tablespoons) in a frying pan, and add the apples.  Cook about 5 minutes.  Stir in the brown sugar and lemon juice.

Once the squash has baked for about 30 minutes, flip it over.  Drain the cranberries, and mix into the apples.  Fill the squash with the apple-cranberry mix, and return to the oven, baking about 30 minutes more, or until the squash is tender.

Garnish with a bit of cinnamon.

Note:

  • You can replace the cranberries with raisins or currents.
  • Soak the fruit in red wine
  • Add some chopped walnuts to the apple cranberry mix before you stuff the squash
Posted in Side Dish, Thanksgiving | Tagged , , , , , , , | 3 Comments

Orange Cranberry Sauce

I grew up eating the canned cranberry sauce, or canned cranberry jelly that everyone else did.  You know the kind.. you open both ends of the can and the wiggle the jelly out — it keeps it’s can shape, and you cut a slice to serve it – looks like this??. Sort of sweet, sort of tart, with an underlying metallic taste to it? Never one of my favorite things.  And that says a lot, because cranberries are one of my all time favorite foods.

So..lets get everyone we know, including you ;) away from the canned version of cranberry sauce/jelly.  This is an incredibly easy and simple recipe, and one you can easily make the day before, or the morning of Thanksgiving or Christmas, or whenever you are going to serve it.

I can’t even say or express to you how incredibly simple this recipe is — you’ll be amazed.

Orange Cranberry Sauce with Cinnamon and Pecans

1/2 cup sugar
1/2 cup brown sugar
1 cup orange juice
2 teaspoons orange zest
1 (12 ounce bag) fresh cranberries
1/4 teaspoon cinnamon
1/4 cup pecans, chopped

In a medium saucepan, dissolve the sugars in the orange juice over medium heat.  Stir well until the sugars are completely dissolved.

Stir in the orange zest, cinnamon and cranberries, and still over medium heat, cook until the cranberries start to split or pop – between 10-12 minutes, usually.

Remove from the heat, and allow to cool slightly.  Remove about 1/2 of the mixture to a large bowl, and using a potato masher, mash the cranberries.  Mix together with the un-mashed portion, and refrigerate for about 2 hours.  To serve, sprinkle the pecans over top.

*Notes:

This recipe is so versatile – the bare minimum you need is the cranberries, sugar, and orange juice – so, you can, if you want:

  • Leave out the orange zest, cinnamon and pecans
  • Don’t have brown sugar?  Use all regular white sugar
  • Don’t have a potato masher?  Don’t mash the cranberries.
Posted in Desserts, Thanksgiving | Tagged , , , , , , | 8 Comments

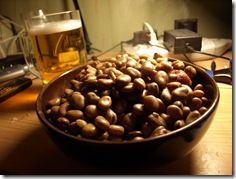
Boiled fava beans.. the best beer snack

Boilded beans

[ This post is written by Sander, expressing his profound love of beans and beer ;) ]

There are many  great snacks to go with beer – potato chips, cheese, various nuts, smoked ribs, pork rinds, pepper sausages and many, many more.

But in my opinion, none of them comes even close to the freshly boiled fava beans – if made in the right way. They are just horrible, if not made in the right way, so do follow my instructions!

Fava or broad beans (Vicia faba, also faba bean, horse bean, field bean, tic bean) should be readily available everywhere in the world. If you cannot find fresh beans, don’t despair – dried ones are even better.

Start by soaking thoroughly rinsed fava beans in cold water – use about three times as much water as you have beans, as they will get a whole lot bigger. You can skip the soaking – but then you’ll have to boil beans for three hours or even more. Therefore, soaking is generally A Very Good Idea.

My personal invention is to add salt to the soaking water – against all expectations, beans soak faster and salt goes into them. You should soak beans at least three or four hours, but more is better. Perhaps around 8 hours is the best.

You can try if they have been soaked enough by tasting them. If they are moist and tasty, easily chewable, then they are ready. Otherwise, soak them some more.

Rinse the beans again and put them to boiling water – you will need about twice as much water as you have beans. Immediately add salt – for one thing, it increases the boiling temperature of the water a bit and secondly, it gives salt more time to go into the beans.

It is critically important to add salt right away. Some people (like my mother) will add salt when beans are almost done – and it has no time to go into the beans. And she wonders why no one wants boiled beans when she makes them. Well, they will taste like someone has already eaten them once and they didn’t sit well in his belly…

Then add smoked pork – you don’t have to add lots or pricey meat. Meat from cheap smoked ribs or ham hocks will do just fine. It is for the taste, so half of a pound is more then enough.

I add usually also some bullion cubes – either pork or some other flavor. Remember that bullion cubes are salty – you don’t want to over salt your delicious beans.

Some people also add onion, I’ve done that occasionally but am not a big fan of it. Try both with and without, perhaps you’ll like the taste. You can also add a bit of oil or butter, that will keep the beans from cracking and make the outside layer a bit softer. If you have fatty meat, though, skip the oil.

Boil on low heat from hour to hour and a half – or even two hours, depending on the size of the beans. Try to contain your hunger for them – they will start smelling delicious loooong before they are ready.

Doesn’t hurt to taste them occasionally, though… ;)

Get rid of the leftover water and pour them into a bowl or bowls. Serve immediately – it is easiest to use just fingers for eating, but a fork is OK as well. Have plenty of nice cold beer ready… and it will be a feast to remember!

However, beans are only good for an hour or so. When they get cold, they aren’t nearly as good. You can try freezing them and heating up in a microwave later, but the resulting mushy mess does not taste anything like the golden brown food of the gods you had before. So, be careful not to make too much at once.

image

(image from Wikipedia)

Posted in Estonian | Tagged , | 1 Comment

Giant Skull out of Pots and Pans

I saw this on BoingBoing this morning, and thought everyone here might enjoy it since it is made out of pots, whisks, dinner plates and such:

From BoingBoing:

A zygomatic bone glommed together from old sauce pots; a mandible constructed from rusty whisks; a maxilla ossified from dinner plates and moustachioed with unwashed spoons. This gloriously sepulchral skull constructed entirely from old cookware and crockery was on display in London’s Regent Park a couple weeks ago as part of the Frieze Art Fair.

Tagged , , , , | Leave a comment

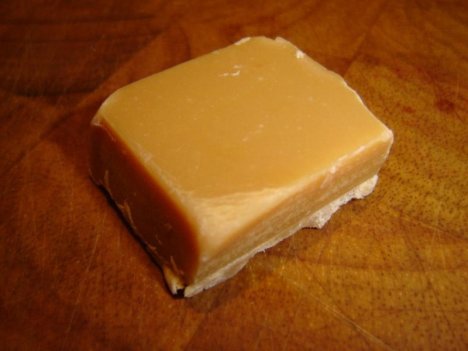
Maple Pumpkin Fudge

If you are into fudge, this recipe is so freaking good.  I love maple flavored fudge, with walnuts, and this recipe fits right into that, with the addition of pumpkin.  Perfect for the Autumn.

I like to individually wrap these for Halloween.  You can get the papers at places like AC Moore or Michaels Arts and Crafts. I usually buy these at SugarCraft.com as you can get various papers for almost anything at great prices.

Maple Pumpkin Fudge

2 cups sugar
1 cup firmly packed brown sugar
3/4 cup butter
2/3 cup evaporated milk
1/2 cup canned pumpkin
1 1/2 teaspoons pumpkin pie spice
1 12 ounce package white chocolate chips
1 7 ounce jar marshmallow creme
1 cup chopped nuts – pecans or walnuts
1 1/2 teaspoons maple extract

In a heavy saucepan over medium heat, mix sugar, brown sugar, butter, evaporated milk, pumpkin and pumpkin pie spices.  Stir constantly, making sure sugar is dissolved.  Once the mixture begins to boil, continue stirring constantly.  Boil this until a candy thermometer reaches the soft ball stage between 234F and 243F degrees.  I usually go for about 237, if possible.

Remove from the heat and stir in the the chocolate chips.  Once the chocolate chips have melted, add in the marshmallow creme, nuts and maple.  Mix well and pour into a lined or buttered pan — use a 13×9 cake pan, if you have it.  Otherwise, pour it into 2 8×8 pans.  Allow to cool and then cut into squares.  Store in an air tight container, and refrigerate up to 10 days.

Posted in Desserts, halloween, Thanksgiving | Tagged , , , , , , , | 1 Comment

Brown Sugar Cinnamon Croissants

Sometimes you just have things in the refrigerator that need to be used up, asap. Such was the case today.  My son likes those Pillsbury Crescent rolls that come in the tube like those pictured here.  For those that have never heard of them, these are raw dough, rolled out, pre-cut and then rolled back up to go into the tube.  You open the tube – pop it open, unroll the dough and then shape them.  Very simple to do.

I don’t mind these, though they of course don’t taste like real crossoints.  But as a quick bread for a meal, they aren’t too bad.

Today, though, I opened the tube, unrolled the dough, and added some brown sugar and cinnamon, with a tiny dollop of butter, and baked them at 375F until they were golden brown. They were light little cinnamon rolls.  Not too bad.

I know there are a lot of different uses for these crescent rolls — wrapping little hot dogs, wrapping brie, wrapping cream cheese and jam, etc.  But I thought for those that needed an idea, and had these on hand, it might be worth this quick little post.

Tagged , , , | Leave a comment