Chili, My Way

“Wish I had time for just one more bowl of chili.” – Kit Carson, frontiersman, “alleged” last words.

If you are a ChiliHead, you’ll probably flame or faint. You are going to read about my Chili recipe.

Yes.. it’s a sacrilegious version. Yes, it contains tomatoes AND beans. And yes, I am sharing the recipe!!

I grew up eating a version of chili similar to the recipe below – it contains tomatoes, it contains beans. Get over it. To me, chili just doesn’t taste the right way without beans. I’ve tried chili with pinto, black, red, and every other color bean. My favorite is still red kidney beans, though black beans are a very second.

Oh. And I don’t like it so spicy hot that I can’t breathe, either. I like to taste it! So, if you are looking for a chili recipe that cuts your taste buds off, this ain’t it. What this recipe lacks in heat, it makes up for with balanced flavors that make your palate delighted that you can read a recipe, and follow directions.

Chili recipes are subjective. They are argued over and debated. The recipes are kept so secret even just asking “What makes this taste so divine?” can get you banned from a booth at a contest. I met a gentleman a few years ago at a chili contest in upstate New York, who told me his recipe was his great- great- grandfathers recipe. Only the men in the family knew the recipe, and only on their deathbeds, or in a will, actually gave the recipe to another person. Held secret, and close, nobody in the family knew how to make it, except the oldest male. It was handed down this way for generations. He received the recipe on a very yellowed and thin paper that almost crumbled in his hand. The recipe had been lightly written in pencil, the ingredients almost unreadable.

He had done things a bit differently than his father and grandfathers, though. After he had the actual recipe, he had the paper restored, and protected. He then stashed this precious recipe in a safe deposit box at a bank. Upon his death, the key goes to his son, and the recipe handed down another generation. This secret recipe had won many a contest, and was a hotly demanded favorite at family functions, as well as by the home community of this gentleman.

There are contests all over the world, from the annual Chili-Cook-Off in Antarctica, to the cook-offs in Australia. Canada, Finland, Great Britain, Hong Kong, Iceland and more. There are hundreds in the US alone. If you get the chance to go to a Chili Cook-off, do it. Besides the chili, you’ll usually find some amazing cooking going on – smoked ribs that are simply divine, pulled pork that you just cannot get enough of and beer – everything from the very basic “Budweis”? to micro-breweries serving local-made beers.

According to the International Chili Society, there were 211 Chili Cook Off Contests in the US in the year 2006. And they don’t list /all/ the contests and fairs. I’m pretty sure you can add at least 300 more small contests to that list and still be way off.

Although the recipe below won?t win any Chili Cook-Off contests, I hope you try it, and enjoy it. Change it, too, and make it your own.
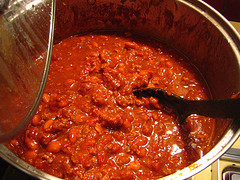
chilisoup.jpg

Old Fashioned Chili

2 Cloves Garlic, Minced
1 Medium Onion, chopped
2 tbsp Vegetable oil
1 pound lean ground beef
28 ounce can tomatos, chopped
1 14 ounce can tomato sauce
3 cups water
2 tomatoes, peeled, seeded, chopped
1 green pepper, chopped
2 tbsp chili powder
1 tbsp paprika
1 tsp rubbed thyme
1/2 tsp dried oregano
1/2 tsp dried basil
1/2 tsp cayenne pepper
1 tsp salt
28 oz can kidney beans, rinsed
1/2 tsp salt (optional)
1 small onion*, chopped
1/2 cup cheddar cheese, shredded

Saute garlic and onion in oil until tender. Stir in ground beef and cook until no pink remains. Drain.

Stir in tomatoes, tomato sauce, water, fresh tomatoes, green pepper, kidney beans and bring to a boil. Reduce heat and simmer.

After first hour, add seasonings. Continue to simmer another 1 1/2-2 hours.

Serve with fresh onions and cheese.

The small onion is for garnish/serving.

upchili2.jpg

Posted in Mexican | Tagged , , , , , , , | Leave a comment

Pickled Sugar Snap Peas

I got a big bag of sugar snap peas at the market, and after eating as many as I could (because I adore these raw), I decided that I could not possibly eat the rest by myself. So, out came Gram’s recipe cards, and I made these. Very simple to do, and so nice. These stay nicely crispy and crunchy (just as I like), and taste like a mouthful of summer.

Enjoy!

Pickled Sugar Snap Peas

1 1/2 cups white wine vinegar
1 1/2 cups water
1 tablespoon pickling salt
1 tablespoon sugar
1 pound sugar snap peas, stemmed
4 garlic cloves, sliced
1 or 2 small dried chile peppers

In a nonreactive saucepan, bring to a boil the vinegar, water, salt, and sugar, stirring to dissolve the salt and sugar. Let the liquid cool.

Pack the peas, garlic, chile peppers, and tarragon into a 1-quart jar. Pour the cooled liquid over the peas, and cover the jar with a nonreactive cap.

Store the jar in the refrigerator for at least 2 weeks before eating the peas. Refrigerated, they will keep for several months.

upchili2.jpg

Tagged , , , , | Leave a comment

Old Fashioned Corn Dogs

Old Fashioned Carnival Corn Dogs

corndogs.jpg

1 cup yellow cornmeal
1 cup flour
1/4 teaspoon salt
1/8 teaspoon black pepper
1/4 cup sugar
4 teaspoons baking powder
1 egg
1 cup milk
1 quart vegetable oil
16 hot dogs
16 wooden skewers

In a deep pan, Heat the oil to 350F.

In a bowl, mix cornmeal, flour, salt, pepper, sugar and baking powder – don’t over mix. In a second bowl, beat the egg, and then add in the milk.  Add to the cornmeal mixture.

Soak the skewers for about 10 minutes in hot water. Insert these into the hot dogs. Dip into the batter and immediately place in the hot oil. Cook about 7-10 minutes. Set aside to drain, and continue cooking until all the hot dogs have been fried. To keep warm, put these in a warm oven – 275F.

Notes:

Use good hot dogs – the type you really like. I like Nathans brand myself.

Add 1 tsp. cayenne pepper to the batter mix. or Add 2 jalapeño peppers (finely chopped) to batter.

The temp and cooking time vary – some recipes I?’ve seen have it set at 360 for 6-8 minutes, or 375 for 4-5 minutes. Try different temps and what works best for you.

These freeze well. Once cooled, store in a plastic bag. To re-heat, heat the oven to 400F, and cook for 10 minutes, or until hot. These don’t microwave well – they get soggy.

Alton suggests, when making his recipe, to put the batter into a tall glass, and dipping the hot dogs into that. It does work, and is a bit less messy.

upchili2.jpg

Tagged , , , , , , , | 3 Comments

Roasted Garlic and Basil Pasta Sauce

A light pasta dish — and one of my favorites. I serve this with Chicken Piccata always – it has enough body to hold up to the bold flavors of the lemon sauce, but a light enough flavor that it won’t over-power the chicken. It can be served on it’s own, or with any type of meat — steak, roast, chicken, pork, fish.

This recipe is nice in summer, when you can pick the basil from the garden, or get it fresh from the market.

Enjoy!

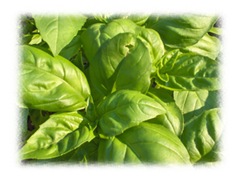
basil

Roasted Garlic and Basil Pasta Sauce

1 roasted garlic bulb
1 minced clove garlic (raw)
1/3 cup butter, cut into small pieces to soften
1/3 cup olive oil
1 handfull basil, chopped or as a chiffonade
Salt and Pepper to taste (kosher salt and fresh cracked pepper)
1 pound linguini, cooked al-dente
1/4 cup shredded cheese — parmesean, romano, asagio

Add roasted garlic paste, raw garlic, butter (softened), oil, salt and pepper to pasta bowl and mash together lightly — enough to mix the garlic and butter into everything.

Add basil and mix lightly again, reserving a small bit of basil for garnish.

Pour hot cooked pasta over sauce and toss to coat. Sprinkle with shredded cheese, and garnish with basil.

upchili2

Posted in Italian, Sauces | Tagged , , , , , , | Leave a comment

Gluten Free Bread

Holly asked for gluten free bread..and here is a recipe that my friend Mark uses.  I’m unsure of his source, but I know he’s used this recipe for a couple of years.

Gluten Free Bread

1 cup of brown rice flour
1 cup almond flour
3/4 cup white rice flour
1/4 cup tapioca flour
2 1/2 teaspoons xanthan gum
1 teaspoon salt
2 teaspoons instant yeast
2 eggs
2 tablespoons honey
2 tablespoons oil
1 teaspoon vinegar or lemon juice
1 – 1  1/2  cups warm water

Mix together in the dry ingredients, using a whisk to mix well.  In a second bowl, mix the eggs, honey, oil, vinegar or lemon juice, and the first cup of water.

Mix until it is thick — should be as thick as pancake mix.  Add additional water as needed to reach the “pancake mix” consistency.

Grease and flour a bread pan, and pour the mixture into it, allowing it to rise for about 45 minutes, or until it is about 3/4 of the pan high.  Heat the oven to 350 degrees F, and bake for about 30 minutes or so.

Notes:

  • Mark also uses this recipe to make pizza.  It’s been a while, and he isn’t around to ask, but I know from my notes on this recipe that he added a bit of extra oil to the batter, and then oiled the baking pan quite a lot., allowing the dough to rise sightly before baking at 400, for 10-12 minutes.
  • Add dried fruits, nutmeg, cinnamon (re-hydrate the fruit slightly by soaking these in very hot water for about 5-7 minutes).
  • Add cinnamon and raisins, or cinnamon and dates (doing the same to the fruits..re-hydrate slightly by soaking these in very hot water for about 5-7 minutes.
Posted in Gluten Free | Tagged , , , , , | 2 Comments

Buckwheat Pasta – Gluten Free

Gluten Free flour is usually found as a mix of rice and tapioca flours. I’ve bought different versions at a local health food store.  And there are products on the market now being sold in standard supermarkets, such as Tom Sawyer All Purpose Gluten Free Flour, though I don’t know if it is sold outside the US.

Buckwheat Pasta

1 Cup Gluten Free Flour
1/4 cup  buckwheat flour
1 egg
1 tablespoon oil
Water as needed

Mix the flours together.  In a separate bowl, whisk the egg and oil together, and add to the flour, mixing well.  Add water as needed — you basically need to add enough water so the pasta can be rolled out.  If it is too dry, it will crack, and if too wet, it’s too sticky to use. If it’s too dry, add more water.  If it is too wet, add more flour.

Roll out the dough on a flour covered surface until it is about 1/8th an inch thick, using flour as needed.  Cut into long strips, or into the shape pasta you prefer.  If you have a pasta machine, roll and cut into the desired shape.

If you are going to cook this right away, know that the cooking time of the pasta is about 2 minutes.

If you are going to store this for later use, refrigerate the shaped pasta in a ziplock or plastic bag.

Posted in Gluten Free | Tagged , , , , , , | 4 Comments